Horseback riding is an exhilarating sport that demands not only skill but also good equipment, especially when it comes to jumping. Whether you are training for an event or just enjoying casual riding, building your own jumps can save you a lot of money while offering the flexibility to customize them for your specific needs. One unique and exciting type of jump you can build is a cheap homemade horse jumps ditch, which mimics natural obstacles often found in eventing and cross-country courses. This type of jump is an excellent challenge for your horse, requiring both precision and careful training.
Creating a cheap homemade horse jump for a ditch is easier than it may seem. With a bit of creativity and some basic materials, you can build a functional and safe ditch jump for your horse that will allow you to practice at home. In this article, we’ll take you through the process of building a cost-effective ditch jump, from gathering materials to assembling the structure, and also provide you with some tips to ensure that it’s both safe and fun for you and your horse.
Why Build a cheap homemade horse jumps ditch?
There are numerous reasons why building your own horse jumps is an excellent idea. First, it’s significantly cheaper than purchasing ready-made jumps from a store. Horse jumps can be quite expensive, especially when you need multiple jumps for different training purposes. By building your own, you have the freedom to select materials that fit within your budget and design jumps that suit your horse’s training level.
Another benefit of creating cheap homemade horse jumps ditch is the ability to customize them to your exact needs. Whether you want to adjust the height, width, or difficulty level of the jumps, you can easily modify your creations over time as your horse progresses. Homemade jumps also give you the flexibility to experiment with various designs, shapes, and features that you might not find in traditional commercial jumps.
What Is a Ditch Jump?
A ditch jump simulates a natural obstacle often encountered in cross-country courses, where a horse must jump over a ditch or narrow water feature. This type of jump is great for improving a horse’s confidence and agility, as it involves navigating over a relatively wide gap. In competition settings, ditch jumps can come in many different variations, but the general concept remains the same: a gap that the horse must clear without landing in the ditch.
A homemade ditch jump doesn’t have to be overly complicated. With some simple planning and basic materials, you can create an obstacle that closely resembles a natural ditch. The purpose of building a ditch jump is to encourage your horse to take the leap with confidence while also ensuring their safety.
Materials You’ll Need cheap homemade horse jumps ditch
Creating a ditch jump doesn’t require a large budget or high-end materials. Many of the materials you can use are easily accessible and relatively inexpensive. Below is a list of some of the most common materials for building a homemade ditch jump:
1. Wooden Pallets or Planks
Wooden pallets or planks are perfect for constructing the base of your jump. Pallets are often free or available for a very low cost from local businesses, especially warehouses or construction sites. You can stack the pallets to form the sides of the jump or use them to create a frame to support other materials. If you can’t find pallets, you can also use wooden planks from any leftover wood you might have lying around.
2. PVC Pipes
PVC pipes are lightweight, inexpensive, and versatile materials that can be used to create the rails of your jump. These pipes are ideal for creating adjustable rails that can be positioned at various heights depending on your training goals. They are easy to cut to the desired length and can be secured with simple clamps or rope. PVC pipes also have the advantage of being safe; they break away easily if your horse knocks them, which reduces the risk of injury.
3. Old Tires
Old tires can be used in various ways to help construct the ditch itself. Tires are durable, versatile, and often free for the taking. You can lay them down in a row to form the edges of the ditch or use them to create a barrier around the ditch. Tires are also heavy, which can help weigh down your jump and keep the structure stable.
4. Cement Blocks or Bricks
Cement blocks and bricks can help reinforce and stabilize the base of the ditch jump. These are particularly useful for making the jump look more natural, especially if you want to create a raised edge for the cheap homemade horse jumps ditch or stack them in a decorative way along the side of the jump. They also add weight and stability to the jump, ensuring it won’t move during use.
5. Rope or Sandbags
Rope can be used to tie together the components of your jump, especially if you’re using PVC pipes as rails. Sandbags can be used to weigh down the structure and keep it secure, particularly in windy conditions. Both materials are affordable and can be easily sourced from any local store.
Previous article; Sony TA Amplifier 1995 A Historical Review of an Iconic Audio Device
6. Fabric or Tarps
To cover the base of the ditch and create a more realistic look, you can use fabric, tarps, or even old carpets. These materials can help to mimic the appearance of a real ditch, making the obstacle more visually appealing to both you and your horse.
7. Nails, Screws, and Wood Glue
To secure the various parts of your jump together, you’ll need basic tools like nails, screws, and wood glue. These will help you assemble the structure of the jump, keeping everything in place for safe use.
Step-by-Step Instructions to Build a Homemade Ditch Jump
Now that you’ve gathered the necessary materials, let’s walk through the process of building a cheap homemade ditch jump. We’ll go over the steps for constructing both the ditch and the jump structure.
Step 1: Plan the cheap homemade horse jumps ditch
Before you start gathering materials or building anything, it’s important to plan out your ditch jump. Consider the following factors:
- Size and Dimensions: The width and depth of the ditch should be appropriate for your horse’s skill level. For a beginner, a small ditch (1-2 feet wide and 1-2 feet deep) will suffice. For more advanced horses, you can increase the width and depth.
- Location: Choose a location on your property where you have enough space to build and ride safely. Ensure the ground is level and firm, as a wobbly or uneven surface could cause your horse to stumble.
- Materials and Budget: Take an inventory of the materials you have and estimate the cost of any additional materials you may need. Decide whether you want to use a natural, rustic design or something more structured.
Step 2: Build the Ditch
- Dig the Ditch: Using a shovel, dig out a shallow trench where you want your ditch jump to be located. The depth should be about 1-2 feet, and the width should be about 3-4 feet, depending on how wide you want the jump.
- Line the Ditch: Line the ditch with a tarp, fabric, or old carpet to create a solid surface that won’t collapse over time. This will also add to the realism of the jump.
- Add Tires or Bricks: For added stability and a more natural look, place old tires or bricks along the edges of the ditch. These will help define the edges of the jump and prevent your horse from falling into the trench.
Step 3: Build the Jump Structure
- Assemble the Frame: Use wooden pallets, planks, or PVC pipes to create the base structure of your jump. You can stack the pallets vertically to create the sides of the jump or use wooden planks to form the railings.
- Attach the Rails: If using PVC pipes, measure and cut them to the desired length. Secure them with rope or clamps across the frame, ensuring they are stable and won’t collapse easily. If using wooden planks, nail them securely to the frame.
- Weigh Down the Jump: To keep your jump stable, add sandbags or cement blocks along the base or at the ends of the rails. This will prevent the jump from shifting or moving when your horse clears it.
- Test the Stability: Before using the jump, test its stability by applying pressure to the rails and base. Ensure that everything is securely fastened and that nothing moves when pushed or pulled.
Step 4: Safety and Final Adjustments
- Ensure Safety: Double-check all parts of the jump to make sure there are no sharp edges or loose components that could cause harm to your horse. Soft, breakaway rails are preferable to rigid ones that could injure your horse if they hit them.
- Adjust the Height: If your jump is adjustable, change the height of the rails as needed for different levels of difficulty. Start with a low jump and gradually increase the height as your horse becomes more comfortable with the obstacle.
- Test with Your Horse: Before fully committing, test the jump with your horse to see how they react. Make sure the cheap homemade horse jumps ditch is visible and inviting, and gradually increase the challenge as your horse’s confidence grows.
Tips for Success
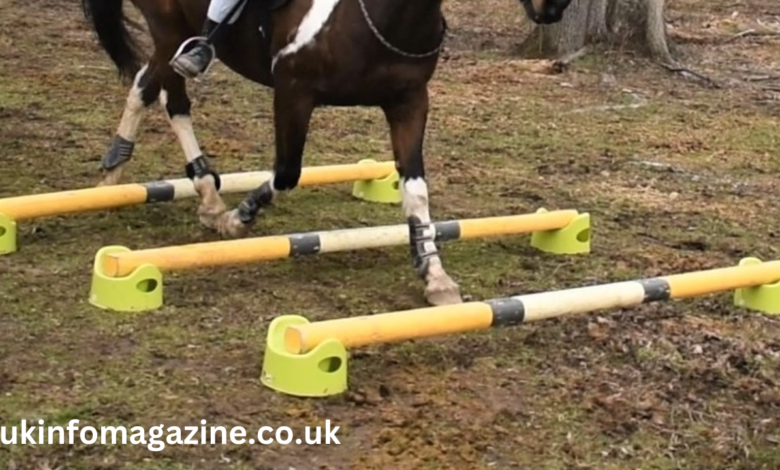
- Start Low: If you’re training your horse to clear a ditch jump, begin with a smaller ditch and lower rails. Gradually raise the height as your horse becomes more comfortable.
- Use Markers: Place cones or markers around the jump to help guide your horse to the right approach.
- Consistency: Practice regularly with your horse, focusing on smooth, confident jumps. Ensure that the ditch jump is part of a consistent training routine to build your horse’s confidence.
Conclusion
Building a cheap homemade horse jumps ditch is an excellent way to improve your horse’s training while saving money. With a few simple materials like wooden pallets, PVC pipes, tires, and fabric, you can create a functional and safe jump that simulates real-life obstacles. By following the steps outlined in this guide, you’ll be able to build a ditch jump that challenges your horse and provides them with the opportunity to develop their jumping skills. Whether you are just starting out or preparing for an event, building your own jumps gives you the freedom to train at home and customize your obstacle course to suit your needs. Happy jumping!