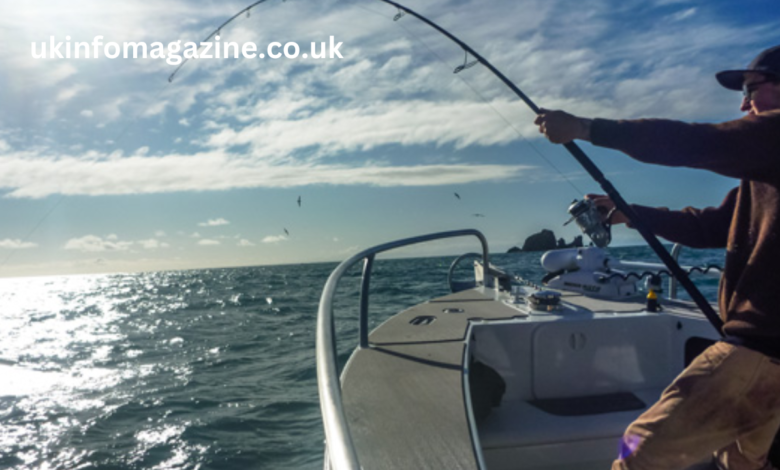
Fishing is a relaxing and rewarding activity, especially when you’re out with a surfcaster rod, which is designed to cast long distances from the shore. However, accidents can happen, and even the most durable rods can develop cracks due to wear and tear, improper storage, or mishandling. If your beloved how to repair cracked surfcaster rod, don’t worry – you don’t need to throw it away or buy a new one. With the right knowledge and tools, you can repair it yourself. In this guide, we will walk you through the process of repairing a cracked surfcaster rod, ensuring you can continue fishing with confidence.
What Is how to repair cracked surfcaster rod?
Before diving into the repair process, it’s important to understand what a surfcaster rod is and how it differs from other types of fishing rods. A surfcaster rod is typically a long, strong fishing rod designed for casting heavy baits and lures over long distances, often from beaches or rocky shorelines. Surfcaster rods are typically made of fiberglass or carbon fiber, offering the flexibility and strength needed for large fish species like striped bass or bluefish.
Due to the unique environment in which they are used, how to repair cracked surfcaster rod are prone to cracking, especially in the areas where the rod experiences the most strain – such as the tip, the joints, or the handle. While a cracked rod may seem irreparable at first, many minor cracks can be fixed at home with a few simple materials and techniques.
Identifying the Crack in Your Surfcaster Rod
Before proceeding with any repairs, you must properly inspect your surfcaster rod to assess the extent of the damage. A cracked rod will usually present itself as a visible fracture along the rod’s shaft, often in the form of small lines or splits. Depending on the location of the crack, the repair process may differ.
Types of Cracks in a Surfcaster Rod
- Hairline Cracks: These are tiny, superficial cracks that usually don’t affect the rod’s performance too much. Hairline cracks can often be repaired by reinforcing the area with epoxy or adhesive.
- Deeper Cracks: These cracks extend into the rod and can affect its structural integrity. Deeper cracks may require additional reinforcement, such as a fiberglass wrap or a more extensive repair method.
- Broken Sections: If a section of the rod is completely broken off, it might be necessary to replace that section or rejoin the broken pieces together, depending on the severity.
Tools and Materials Needed for the Repair
Before you begin repairing your cracked surfcaster rod, gather the necessary tools and materials. Having everything you need on hand will make the process more efficient. Here’s a list of tools and materials you will need:
- Epoxy resin or rod repair adhesive
- Fiberglass repair tape or cloth
- Sandpaper (medium and fine grit)
- Rag or cloth for cleaning
- Scissors or a utility knife
- Mixing cup and stir stick
- Heat gun or blow dryer (optional)
- Protective gloves (optional)
Step-by-Step Guide to how to repair cracked surfcaster rod
Step 1: Clean the Cracked Area
The first step in any rod repair process is cleaning the area surrounding the crack. Using a rag or cloth, wipe down the cracked area to remove any dirt, oil, or saltwater residue. It is essential to clean the rod thoroughly before applying any adhesive or epoxy to ensure a strong bond.
Step 2: Assess the Crack’s Severity
Once the area is clean, take a closer look at the crack. If it’s a minor, superficial crack (hairline crack), you may only need to apply epoxy resin or rod adhesive. However, if the crack is deeper, you will need to take additional measures, such as reinforcing the crack with fiberglass tape.
For severe cracks where the rod is broken in half or the crack extends through the full thickness of the rod, you may need to replace the affected section entirely, or attempt to rejoin the broken pieces.
Step 3: Sand the Cracked Area
Next, lightly sand the cracked area with medium-grit sandpaper (around 120-grit). This will help to roughen the surface, allowing the epoxy or adhesive to bond more effectively to the rod. Sanding also removes any sharp edges from the crack, preventing further damage and reducing the risk of injury.
Once the area has been sanded, switch to fine-grit sandpaper (around 220-grit) to smooth the surface. Be sure to clean the area again to remove any dust from sanding..
Previous article; The Best way to support back of Car Radio mount
Step 4: Apply the Epoxy or Adhesive
For minor how to repair cracked surfcaster rod, you can use a two-part epoxy resin or rod repair adhesive. Follow the manufacturer’s instructions to mix the epoxy in the correct proportions. Typically, you’ll mix the two components of the epoxy together in a small mixing cup.
Once mixed, carefully apply the epoxy over the crack, using a small brush or a disposable spatula. Be sure to apply the epoxy evenly, ensuring it penetrates the crack and covers the surrounding area. If the crack is deeper or the break is more significant, you may want to apply a layer of fiberglass cloth or tape over the crack for added reinforcement.
Step 5: Reinforce the Crack with Fiberglass (If Necessary)
If you are dealing with a deeper crack, it’s best to use fiberglass cloth or tape to reinforce the repair. Cut a piece of fiberglass cloth or tape that is slightly larger than the cracked area. After applying the epoxy to the crack, press the fiberglass cloth or tape over the crack and smooth it out.
Fiberglass is strong and flexible, providing added durability to the repair. The fiberglass will bond with the epoxy, creating a tough and rigid repair.
Step 6: Allow the Epoxy to Cure
After applying the epoxy and reinforcing it with fiberglass (if necessary), allow the repair to cure. The curing time will vary depending on the type of epoxy used, but it usually takes around 24 hours for the adhesive to fully harden. Do not rush this process; allowing the epoxy to cure completely will ensure that the repair holds up over time.
Step 7: Sand and Smooth the Repair
Once the epoxy has cured, use fine-grit sandpaper to smooth out the repair. You want to ensure the surface is even and that no excess epoxy is protruding. Sand the repair carefully to maintain the rod’s original shape and appearance.
Step 8: Reapply Epoxy or Finish (Optional) how to repair cracked surfcaster rod
If necessary, apply a thin final layer of epoxy to the repaired area to ensure a smooth and seamless finish. Once this layer cures, sand it down one more time to smooth the surface.
Step 9: Test the Repair
After the repair has cured and the area is smooth, it’s time to test the rod. Gently bend the rod to ensure that the crack is properly reinforced and that there is no flexing or breaking in the repaired area. If the rod seems sturdy and the repair is holding up well, you can proceed to use the rod again.
Step 10: Prevent Future Damage
Once your surfcaster rod is repaired, it’s important to take steps to prevent future damage. Here are some tips to keep your rod in excellent condition:
- Store the rod properly: Store your rod in a rod rack or case to avoid accidental damage. Avoid leaving it in extreme temperatures or direct sunlight.
- Avoid dropping or bumping the rod: Take care when handling your rod, especially in rocky or rugged environments.
- Check your rod regularly: Inspect your rod before and after each use for any signs of damage or wear. This will allow you to catch potential issues early.
Conclusion
How to repair cracked surfcaster rod is a practical and cost-effective way to extend the life of your fishing equipment. By following the steps outlined above, you can easily repair minor cracks and get back to enjoying your fishing trips. Remember to always handle your rod with care and perform regular maintenance to avoid future damage.
With the right materials, a little patience, and some attention to detail, you can keep your surfcaster rod in top condition for years to come, ensuring many more successful fishing adventures.