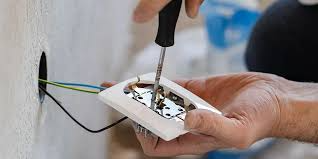
Capacitors are one of the most common and crucial components in electronic circuits. They store electrical energy temporarily and release it when needed. Capacitors are found in a wide range of applications, from power supply smoothing in computers to filtering in audio equipment. Over time, however, capacitors can fail, leading to circuit malfunctions. How to test a capacitor is essential to ensuring their continued functionality. This guide will cover various methods of testing capacitors, from simple visual checks to using advanced tools.
What is how to test a capacitor?
A capacitor is an electronic component that stores and releases electrical energy in a circuit. It consists of two conductive plates separated by an insulating material called a dielectric. When a voltage is applied across the plates, the capacitor stores charge, and the amount of charge it can store is determined by its capacitance. Capacitance is measured in farads (F), although how to test a capacitor typically come in much smaller units like microfarads (µF), nanofarads (nF), or picofarads (pF).
Capacitors play vital roles in electronic systems, such as smoothing power supplies, coupling signals between stages of amplifiers, or filtering out unwanted noise in circuits. Over time, factors such as temperature, humidity, or voltage stress can degrade a capacitor’s performance.
Testing a capacitor can help determine whether it is functioning properly or needs replacement. Here, we will cover the different ways to test a capacitor to identify potential issues and ensure optimal performance in electronic systems.
Why Test a Capacitor?
Capacitors can fail in several ways, including:
- Loss of Capacitance: A capacitor may lose its ability to store charge, leading to a reduction in capacitance.
- Short Circuits: The dielectric material between the plates can break down, causing the capacitor to short, which could lead to circuit damage.
- High ESR (Equivalent Series Resistance): A capacitor with high ESR can still maintain its capacitance but may not function effectively, causing power loss or heat generation.
- Leakage: For electrolytic capacitors, leakage is a common failure mode, where the internal electrolyte escapes or evaporates.
- Open Circuit: The capacitor may simply become an open circuit with no continuity, rendering it ineffective.
Testing a capacitor allows you to identify these issues early, which can save time, effort, and money when troubleshooting faulty circuits.
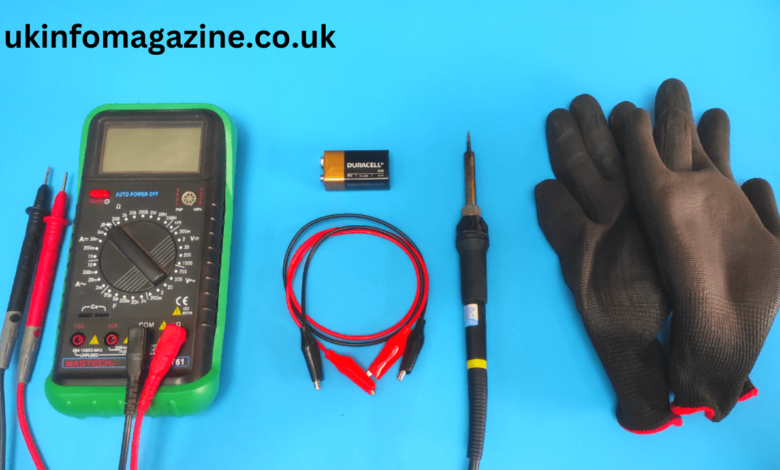
Tools Required for how to test a capacitor
Before testing, it’s essential to have the right tools for the job. The following are the most common tools used to test capacitors:
- Multimeter (with capacitance testing capability)
- Digital or Analog Oscilloscope (optional for more advanced testing)
- ESR Meter
- LCR Meter
- Power Supply and Resistor (for manual discharge tests)
- Soldering Iron (to remove the capacitor from the circuit if necessary)
Having these tools will allow you to perform different types of tests and diagnose issues with the capacitor effectively.
Methods for Testing Capacitors
1. Visual Inspection
The simplest method for testing a capacitor is to visually inspect it for any signs of physical damage. Capacitors can fail due to heat, age, or excessive voltage, so inspecting them for visible problems can help you identify potential issues.
Signs to look for during visual inspection:
- Bulging: A bulging or deformed top or bottom of the capacitor indicates internal pressure buildup, often due to gas generation. This is common in electrolytic capacitors and is a sign of impending failure.
- Discoloration: Excessive heat can cause how to test a capacitor to discolor. This may indicate the capacitor has been stressed and is no longer functioning correctly.
- Leaking: Some capacitors, particularly electrolytic ones, can leak their internal electrolyte. This is a clear indication that the capacitor has failed or is failing.
- Cracks or Broken Leads: Cracks or broken leads often occur from excessive heating or mishandling. This can cause intermittent or total failure of the capacitor.
- Burn Marks or Smell: A burnt capacitor may leave visible marks or an unpleasant odor. This is often a result of overheating or circuit malfunction.
While visual inspection cannot detect all failures, it can give you a quick indication of whether a capacitor needs replacement.
2. Using a Digital Multimeter (Capacitance Measurement)
A digital multimeter (DMM) with capacitance measurement capability is one of the most common tools for testing capacitors. Here’s how to use it:
Steps to test a capacitor with a multimeter:
- Discharge the Capacitor: Before testing, always discharge the capacitor to avoid damage to the multimeter or electric shock. You can use a resistor (typically 10kΩ) to discharge the capacitor safely. Connect the resistor across the capacitor leads for a few seconds.
- Set the Multimeter to Capacitance Mode: Set the multimeter to the capacitance measurement setting (usually denoted by a symbol “F” for farads).
- Connect the Multimeter Leads to the Capacitor: Attach the multimeter’s leads to the capacitor terminals, ensuring correct polarity for polarized capacitors (such as electrolytic capacitors).
- Read the Measurement: Observe the reading on the multimeter. The capacitance should be close to the value marked on the capacitor. If the value is significantly lower (more than 20% below the rated capacitance), the capacitor is likely defective and needs to be replaced.
Note: This method works best for capacitors that are in good condition. If the capacitor is open or has a short, it may not show any capacitance.
3. Using a Digital Multimeter how to test a capacitor
While a multimeter’s capacitance function is useful, you can also use its resistance function to check for certain types of failures, such as short circuits or open circuits.
Steps for resistance testing:
- Set the Multimeter to Resistance Mode: Turn the multimeter dial to the resistance measurement mode (Ω).
- Test the Capacitor: Place the multimeter probes across the capacitor terminals.
- Normal Resistance Behavior: If the capacitor is good, the resistance will initially be low as the capacitor charges, then increase toward infinity as the capacitor becomes fully charged.
- Short Circuit: If the resistance remains very low (close to 0Ω), the capacitor is likely shorted and must be replaced.
- Open Circuit: If the resistance reads as infinite (no continuity), the capacitor has an open circuit and is non-functional.
This test can give you a quick indication of a capacitor’s basic health, though it may not be as precise as measuring capacitance directly.
Previous article; Ds040732i2 Dodge Ram tipm repair remote and Solutions
4. ESR (Equivalent Series Resistance) Test
The ESR is a measure of the resistance encountered by current flowing through the capacitor when it is in operation. Even if a capacitor maintains its capacitance, a high ESR can reduce the how to test a capacitor effectiveness and cause excessive heat generation. This is especially important for electrolytic capacitors.
To test ESR, you will need an ESR Meter, which is designed specifically for this purpose. Here’s how to test using an ESR meter:
- Set up the ESR Meter: Follow the manufacturer’s instructions for your specific ESR meter.
- Connect the Probes: Attach the probes of the ESR meter to the capacitor’s terminals, ensuring the correct polarity for polarized capacitors.
- Read the ESR Value: A low ESR value indicates the capacitor is in good condition, while a high ESR value (often above 1Ω for electrolytic capacitors) suggests the capacitor is failing.
High ESR can cause issues in power supplies, signal filters, and other critical applications where a low resistance path is needed.
5. Using an LCR Meter (Inductance, Capacitance, and Resistance) how to test a capacitor
An LCR meter is another precise instrument used for testing capacitors, especially when you need to measure a capacitor’s inductance, capacitance, and resistance. The LCR meter is ideal for advanced applications where exact values are required.
- Set the LCR Meter: Configure the meter to measure capacitance.
- Connect the Capacitor: Attach the leads of the LCR meter to the capacitor.
- Check the Readings: The LCR meter will provide accurate measurements of the capacitance, ESR, and other parameters of the capacitor.
This method is the most accurate for evaluating a capacitor’s health, particularly in critical applications.
6. Charging and Discharging Test (Basic)
For small capacitors, you can use a simple method of charging and discharging to assess its condition. This test is especially useful if you don’t have advanced tools like an ESR meter or LCR meter.
Steps to charge and discharge a capacitor:
- Charge the Capacitor: Connect the capacitor to a voltage source (such as a 9V battery) for a few seconds, ensuring that you don’t exceed the capacitor’s rated voltage.
- Disconnect the Voltage Source: Remove the power supply and measure the voltage across the capacitor.
- Discharge the Capacitor: Connect a known resistor (such as 1kΩ to 10kΩ) across the capacitor to discharge it. The voltage across the capacitor should decrease over time.
- Observe the Results: A good capacitor will hold its charge for a reasonable time. If the voltage drops too quickly, the capacitor is likely defective.
7. Advanced Testing with an Oscilloscope
In advanced scenarios, an oscilloscope can be used to check the performance of capacitors, especially in high-frequency circuits. You can apply a test signal to the capacitor and observe the waveform on the oscilloscope to analyze the capacitor’s behavior in the circuit.
Conclusion
How to test a capacitor is crucial for maintaining the reliability of electronic circuits. By using various methods, such as visual inspections, multimeter tests, ESR meters, and advanced LCR meters, you can ensure that capacitors function correctly and prevent potential circuit failures. Regular capacitor testing can save you time and money by allowing you to replace failing components before they cause significant issues in your projects or devices. Always handle capacitors carefully, discharge them properly before testing, and select the right tools for your specific testing needs.